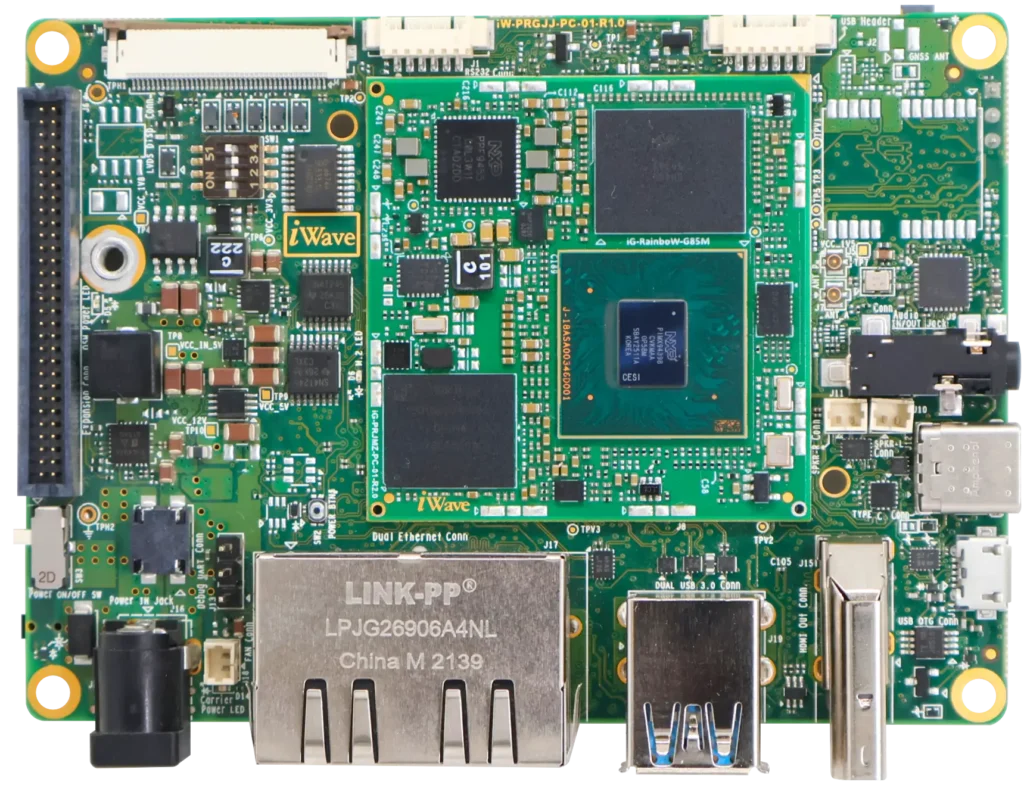
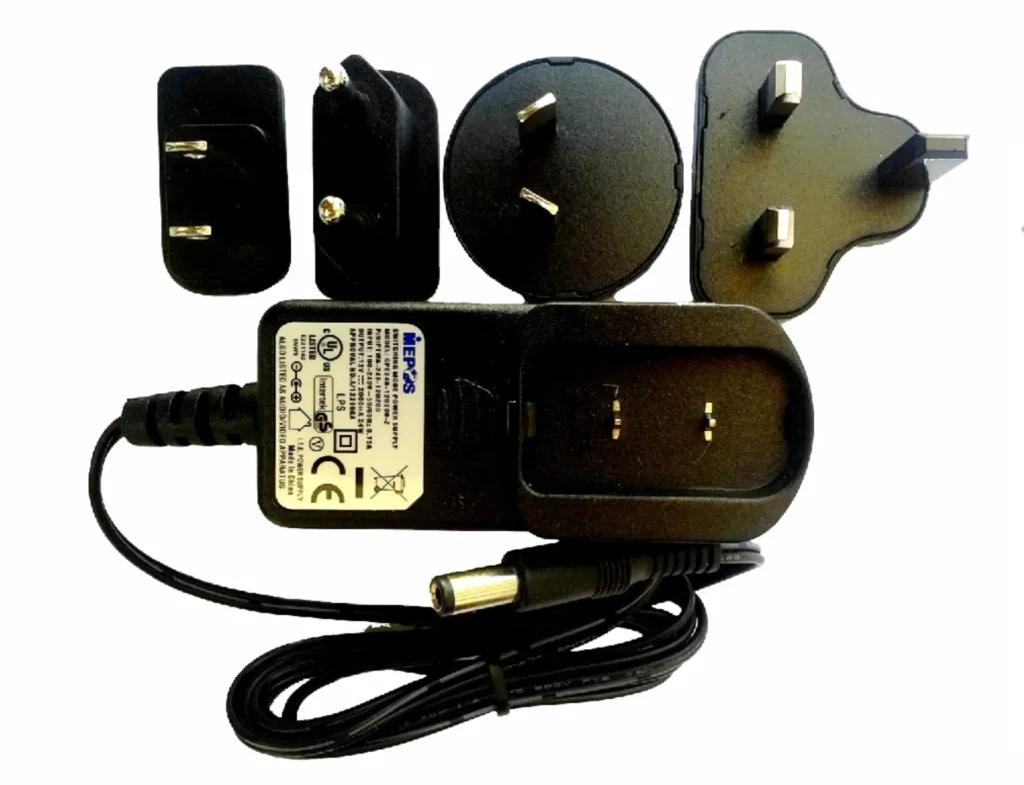
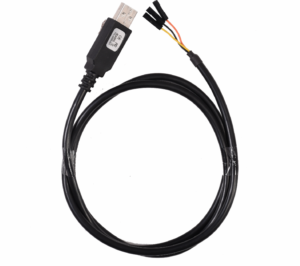
Remove the SBC from box and place above the ESD free area. Use anti-static pad/mat with proper grounding to place the SBC. Also make sure that, below deliverables are received without any physical damage.
Development kit contains:
NXP i.MX 94 SBC
12V, 2A Power Supply
Safety guidelines
USB Debug cable *
NXP i.MX 94 SBC
12V, Power Supply
USB Debug cable *
* Optional
Safety Guidelines
Environmental Compliance iG-G85S i.MX 94 SBC Development Platform is designed by using oHS and REACH compliant components and manufactured on lead-free production process.
ESD Protection This development platform is ESD sensitive. Handle the product only in accordance with the installation instructions given in the manual. Therefore ESD precautions should be taken care during transport and handling. Must use a ESD ground strap or other grounded source before unpacking or handling the hardware.
Product Disposal Check the local regulations for disposal of electronic products before disposing.
Get to know
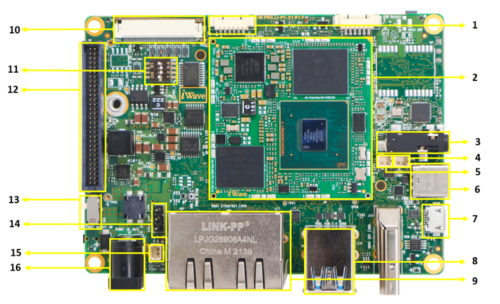
NXP i.MX 94 SBC -Top View
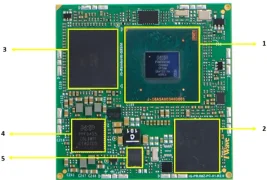
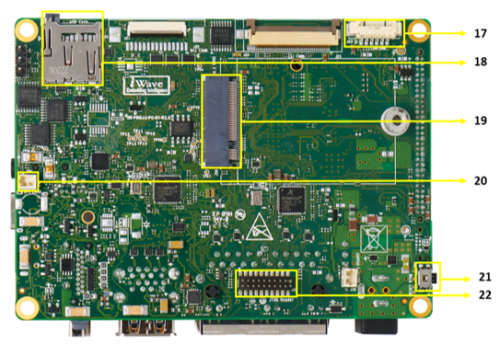
NXP i.MX 94 SBC -Bottom View
i.MX 94 SOC
eMMC
LPDDR5
PMIC
VDD_SOC Regulator
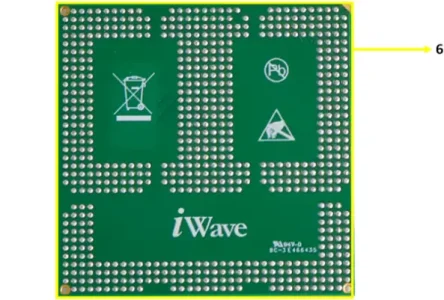
6.OSM LGA
NXP i.MX 94 SBC – Top view
RS232 Header
i.MX 94 Size-L OSM
Audio Jack
Speaker Header Left
Speaker Header Right
Type-C connector
USB2.0 OTG Connector
Dual USB 3.0 connector
Ethernet Jack
LVDS Connector
Boot Selection Switch
Expansion connector
Power ON Switch
Debug UART Header
FAN header
12V Input – Power Jack
NXP i.MX 94 SBC – Bottom view
CAN Header
Micro SD Connector
M.2 Key-B PCIe Connector
RTC Battery Header
RESET Button
JTAG Header
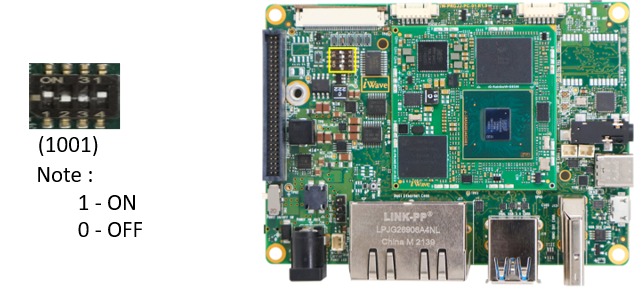
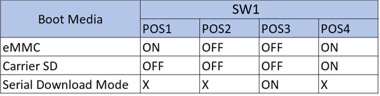
Boot Switch Setting
Make sure On-Board Switch (SW1) is set properly as shown below image.
SW1-Boot Selection Switch.
Table 1: Boot Media Switch Settings
* POS4 for selecting USB Top port or USB OTG. To select USB OTG, POS4 should be high
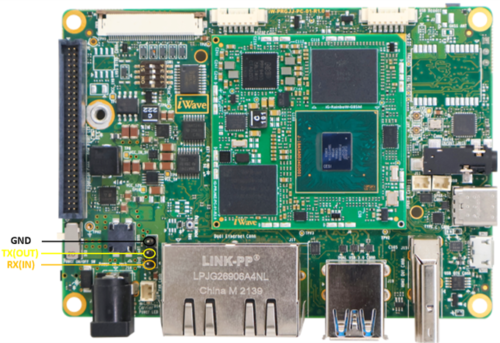
Debug Port Setting
Connect Type A end of TTL-232R-RPI cable to PC and 3pin (100mil) Berg House end of TTL-232R-RPI cable to Debug UART Header (J13) as shown below.
Use one of the terminal application depending on the operating systemof the host machine:
On the command prompt of the Linux host machine, run the following command to determine the port number: $ ls /dev/ttyUSB* The smaller number is for Arm® Cortex®-A53 core and the bigger number is for Arm® Cortex ®-M4 core.
Minicom
Use the following commands to install and run the serial communication program (minicom as an example):
Download Tera Term. After the download, run the installer and then return to this webpage to continue.
LaunchTeraTerm. The first time it launches, it shows the following dialog. Select the serial option. Assuming your board is plugged in, there should be a COM port automatically populated in the list.
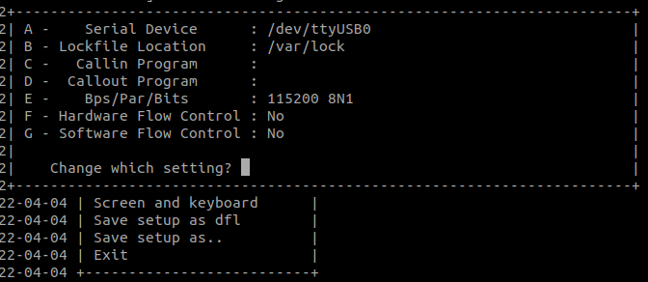
Configure the Serial Port Settings.
Go to Setup –> Serial Port and change the settings as shown below.
Verify that the connection is open. If connected, Tera Term shows something like below in its title bar.
DownloadPuTTY. After the download, run the installer and then return to this webpage to continue.
Launch PuTTY by either double clicking on the executable file you downloaded or from the Start menu, depending on the type of download you selected.
Configure in the window that launches. Select the Serial radio button and ether the COM port number that you determined earlier. Also enter the baud rate, 115200
Click “Open” to open the serial connection. Assuming the board is connected and you entered the correct COM port, the terminal window opens. If the configuration is not correct, puTTY alerts you.
Next step is to Power ON the board.
Powering ON
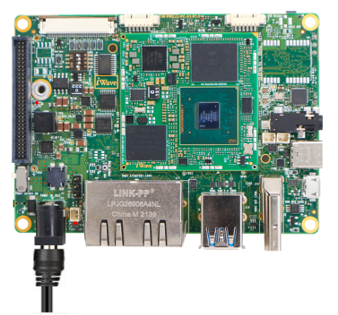
Connect the 12V power supply plug to the power connector (J20) of the iG-G85S-NXP i.MX 94 SBC as shown below and switch ON the power supply.
Once power is applied to the SBC, the LEDs in the iG-G85S-NXP i.MX 94 SBC will glow as shown in the image below
Warning:
Do not try to connect any other Power Supply other than supplied along with iG-G85S-NXP i.MX 94 SBC .
Contact iWave, if power LEDs are not glowing
Boot screen
User must go through “Software User Guide” and get familiar with software section of iG-G85S NXP i.MX 94 SBC.
Operating System Support
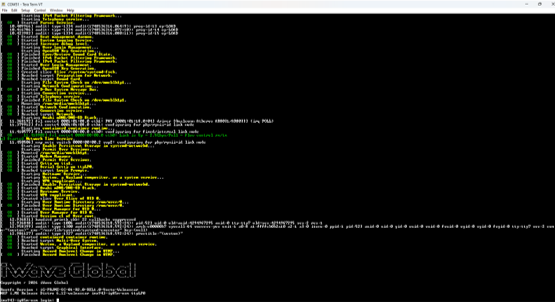
Power is applied to the SBC & Once the boot get success, depending upon the supported Operating systems and boot loader on particular delivery, boot messages being prompted in the terminal window as shown below. Press Enter key in terminal and done with test environment setup on particular delivery.
Command Prompt (Linux)
Contact Us
We appreciate you contacting iWave. Our representative will get in touch with you soon!